Spring/Spring Boot
[Spring Boot] DTO를 DB에 저장
JoonYong
2024. 2. 18. 20:47
반응형
https://achieve-dev.tistory.com/41
[Spring boot] 폼데이터를 DTO로 받기
오늘은 스프링 부트에서 웹 폼(form) 데이터를 DTO(Data Transfer Object)로 받는 방법에 대해 알아보겠습니다. ● 폼 데이터(Form Data): 웹 페이지에서 사용자가 입력한 데이터를 서버로 전송하기 위한 형
achieve-dev.tistory.com
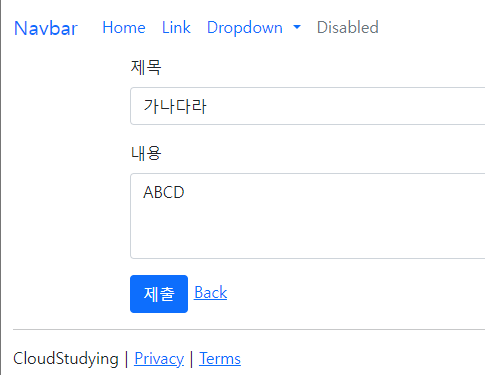
이전 시간에 웹 브라우저에서 전송한 폼 데이터를 DTO에 담아 컨트롤러로 받아왔었습니다.
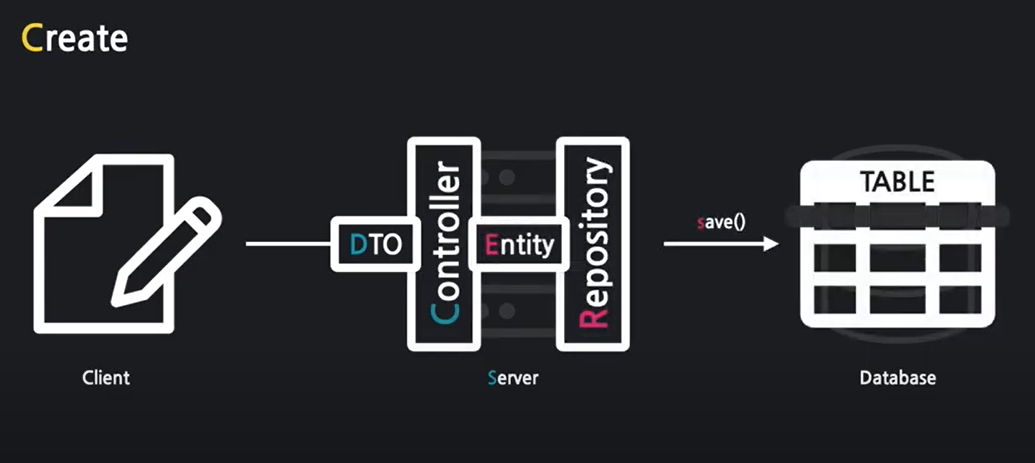
이번에는 DTO를 데이터베이스에 저장하는 방법을 작성하겠습니다.
● JPA
스프링 부트는 자바언어를 사용합니다. 하지만 DB는 SQL이라는 언어를 사용하기 때문에 JPA(Java Persistence API)란 언어를 사용하여 자바 언어로 DB에 명령을 내릴수 있고 데이터를 객체지향적으로 관리할 수 있게 해줍니다.
● JPA의 핵심 도구
○ Entity : 자바 객체를 DB가 이해할 수 있게 만든 것으로, 이를 기반으로 테이블이 만들어집니다.
○ Repository : 엔티티가 DB 속 테이블에 저장 및 관리돌 수 있게 하는 인터페이스입니다.
[ArticleController.java] 전체
@Controller
public class ArticleController {
// 레파지토리를 주입받음
@Autowired // 스프링부트가 미리 생성해놓은 객체를 가져다가 자동 연결!
private ArticleRepository articleRepository;
// 폼 페이지 보여주기
@GetMapping("/articles/new")
public String newArticleForm() {
return "articles/new";
}
// 폼 데이터 받고 DB에 저장하기
@PostMapping("/articles/create")
public String createArticle(ArticleForm form) {
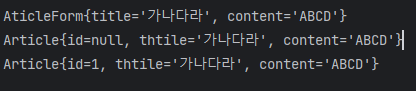
System.out.println(form.toString()); // 잘 담겼는지 확인
// 1. DTO -> (Controller) -> Entity
Article article = form.toEntity();
System.out.println(article.toString());
// 2. Entity -> (repository) -> DB
Article saved = articleRepository.save(article);
System.out.println(saved.toString());
// 3. view page
return "";
}
}1. DTO -> (Controller) -> Entity
[ArticleController.java] 일부분
Article article = form.toEntity();
DTO를 DB가 이해할 수 있도록 Entity로 변환 해야한다.
[dto / ArticleForm.java]
// 폼데이터를 받아올 그릇
public class ArticleForm {

    private String title; // 제목 받을 필드
    private String content; // 내용 받을 필드

    public ArticleForm(String title, String content) {
        this.title = title;
        this.content = content;
    }

    @Override
    public String toString() {
        return "AticleForm{" +
                "title='" + title + '\'' +
                ", content='" + content + '\'' +
                '}';
    }

    // DTO -> Entity
    public Article toEntity() {
        return new Article(null, title, content);
    }
}
toEntity() 메서드 추가 - DTO인 form 객체를 엔티티 객체로 변환하는 역할
[entity / Article.java]
@Entity // DB가 해당 객체를 인식 가능
public class Article {

    @Id     //대표값 지정
    @GeneratedValue// 1, 2, 3, ... 자동 생성 어노테이션/ (DB가 id를 자동생성)
    private Long id;

    @Column  // 컬럼으로 지정
    private String thtile;

    @Column
    private String content;

    public Article(Long id, String thtile, String content) {
        this.id = id;
        this.thtile = thtile;
        this.content = content;
    }

    @Override
    public String toString() {
        return "Article{" +
                "id=" + id +
                ", thtile='" + thtile + '\'' +
                ", content='" + content + '\'' +
                '}';
    }
}
Article 클래스 생성
2. Entity -> (repository) -> DB
[ArticleController.java] 일부분
// 레파지토리를 주입받음
@Autowired // 스프링부트가 미리 생성해놓은 객체를 가져다가 자동 연결!
private ArticleRepository articleRepository;

..(생략)..

Article saved = articleRepository.save(article);
레파지토리를 이용하여 엔티티를 DB에 저장해야합니다.
[repository / ArticleRepository]
// 레파지토리를 직접 구현할수도 있지만 JPA에서 제공하는 레파지도리 인터페이스를 활용함
public interface ArticleRepository extends CrudRepository<Article, Long> {

}
JPA에서 제공하는 레파지토리 상속받아서 사용함
3. 결과
반응형